Saturday, June 26, 2010

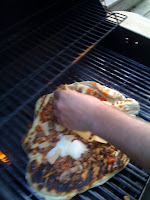
Recipe: Grilled Pizza

GRILLED PIZZA

This is actually going to be less of a recipe than a technique.  What you put on your pizza is up to you, though I'm a fan of chorizo sausage, mushrooms, and olives, as well as aged gouda and asiago cheeses.

1 lb pizza dough (home made or bought)
1/2 cup cup olive oil, divided into 2 parts
1/3 c tomato sauce
1/2 cup shredded cheese
1/2 cup other toppings

Clean your grill.  Anything on the grill grates will end up on the dough.  Then brush the grates with olive oil.  Finally, turn all burners as high as they will go.  If using charcoal, light it up and let it get hot.  Close the cover.

Slice and cook your toppings, if necessary.  Any raw meats (bacon, sausage, etc.) and most mushrooms or veggies (onions, peppers, asparagus spears, etc.) should be cooked prior to putting them on the pizza, because they won't be on the heat long enough to cook through when the pizza goes on the grill.  Also, this is a thin-crust pizza, so be fairly sparing with your toppings.

In the kitchen, lightly flour a large pizza peel or flip a cookie sheet over and flour the underside.  Stretch the dough as thin as you can get it, and then roll it even thinner.  You want it as thin as you can get.  Brush it with olive oil.  


You want your grill thermometer to read at least 550 -- the higher the better.  

BE WARNED: ONCE YOU START YOU HAVE TO MOVE FAST.  YOU NEED EVERYTHING EASILY ACCESSIBLE.  IT WILL GO FROM YUMMY TO CHARCOAL QUICKLY IF YOU ARE NOT CAREFUL.

Flip the dough over directly onto the grill, so that the oil side is down.  Quickly brush the other side with oil.  Allow to cook 1-2 minutes, until "blisters" form that you can see on the dough.  Once new blisters  have stopped forming (no longer than 3 minutes), take a pair of tongs or the pizza peel, and take the dough off the grill and flip it over so that the raw side is down.  (If your grill is clean, it will not stick.)  

Work quickly, now.  Put the tomato sauce on the dough, and smear it around.  Sprinkle the toppings onto the pizza, starting with any meat/vegetables and ending with the shredded cheese.   Don't take more than 1 minute to do all of this.  Now, close the grill for another 2-3 minutes.  You want to trap as much heat as you can so that the cheese can melt.  Open the grill lid and remove the pizza.

Allow to rest for a few minutes, then slice and serve.


Monday, June 21, 2010

Recipe: Ground Turkey Stroganoff

GROUND TURKEY STROGANOFF

3 Tbsp olive oil
1/2 lb (8 oz) mushrooms (white button or crimini), sliced
1/4 tsp salt
1 onion,  sliced or roughly chopped
1 package (usually around 1 1/4 lb) ground turkey
1/4 cup flour
2 cups turkey, chicken, or vegetable stock (broth will work in a pinch)
2 Tbsp sherry (not cooking sherry; NEVER cooking sherry)
1 tsp ground dry mustard
2 Tbsp tomato paste
pinch (1/8 tsp) each oregano and dill
1 cup green (sweet) peas
1/3 cup low- or non-fat Greek yogurt or sour cream

Heat the olive oil in a saute pan over medium-low heat.  Add the mushrooms and salt, and saute.  When cooked, remove from the pan.  Add the onions and cook.  When transparent, add the ground turkey and cook until no longer pink.  Turn the heat to high and cook out most of the moisture -- but not all.

Reduce heat back to medium.  Add the flour to the pan, stirring to combine.  Cook for 2-3 minutes (this will cook out the "flour" taste.  Slowly add the stock, stirring constantly to avoid lumps.  Allow it to come to a boil, stirring occasionally, until it thickens slightly.  Add the sherry, mustard, tomato paste, and herbs, stirring.  Boil for 10-20 minutes, until the consistency of a thick gravy.  Add the yogurt and stir it in.  Remove from heat.  Serve with egg noodles or fresh french baguette.


Friday, June 18, 2010

Recipe: Your Own Microwave Popcorn

YOUR OWN MICROWAVE POPCORN

1/4 cup unpopped popcorn
1 lunch-sized brown paper bag
1 stapler
1 microwave

Put the unpopped popcorn into the bag.  Use 1 staple to close the bag.  Put the bag in the microwave.  Nuke it on high for 3-5 minutes, depending on your machine, or until the pops are 3-5 seconds apart.

Easy isn't it?  Most people will have objections to this, though, so I'll counter as many as I can think of

1)  The staple is metal, and you can't put metal in the microwave.

Both are true.  However, the staple is actually SHORTER than the wavelengths of the energy put out by the microwave.  [Techspeak:  A microwave generates radiation with a wavelength of approximately 4.10 inches (122 millimeters)].  So long as you use only 1 staple, you're not going to cause any arcing or ruin your microwave.

2)  I don't microwave popcorn because it burns easily.

True, but only if you buy microwave popcorn.  In "store-bought" popcorn, there is a good deal of solidified oil (i.e., fat) in the bag along with the popcorn.  That's why it doesn't rattle when you shake it.  Microwaves heat fat and water molecules much more efficiently than starch molecules.  [Techspeak:  The polarized molecules absorb non-ionizing microwave radiation using dielectric heating, and the molecules rotate and vibrate to align themselves.]  In a bag of "store-bought" popcorn, you are heating the oil, which in turn heats the popcorn to make it pop....but the oil stays hot.  This is what makes store-bought popcorn burn so easily.

Since there is no oil in this bag of popcorn, though, this can't happen.  Instead, the microwaves are exciting the water molecules trapped inside the popcorn kernels.  When they pop, the water immediately evaporates.  Since starch molecules do not heat as easily in a microwave, they will not burn easily.  It's possible to do so, I guess, but I've not yet done it.

3)  The popcorn isn't popping very fast compared to the bags I buy from Orville Red.....

That's because there's no oil in this bag.  Also, there's a lot less popcorn in this bag.  Look at the nutritional information on the bag of Orville's.  You'll see that there's 3 servings of popcorn in that bag.  When was the last time you ate 1/3 of a bag of microwave popcorn?

Look also at the calories.  You're getting 230-250 calories per serving.  Multiply that by 3, and you're getting around 690-750 calories in that bag of Orville's -- most from fat.  I hope you skipped a meal or two, because the average adult needs 2,000 -- 2,500 calories per day.  Congrats, you just ate about 1/3 of your daily calories.

This recipe, however, using Orville's popcorn that you'd pop on the stove or in an air-popper, is about 160 calories for the WHOLE RECIPE.  Technically, the recommended serving size is 3 Tbsp unpopped (a 1/4 = 4 Tbsp), but I like popcorn.  It's also a heck of a lot cheaper this way, costing only a few cents to make mine vs. more than dollar per bag for most microwave popcorn brands.

If you want to add a little salt, herbs, olive oil, butter, etc., to flavor your popcorn, go ahead....I like my popcorn naked, though.

Wednesday, June 16, 2010

Review: The Corner Room

The Corner Room (110 Exchange St., Portland, ME) is named such because it sits at the corner of 2 streets (Exchange and Federal Streets) at the "top" of the Old Port section of Portland.  They do not take reservations, but there were plenty of tables free when I went there on a Friday night.


There are tables lining one wall that is primarily windows, some booths in the center of the space, and the kitchen and a bar to the left as you enter the area.  There are also a few tables outside on the fairly busy sidewalk on Federal Street.  Since the sidewalk isn't very wide and the tables outside aren't very big, this would not be a good place to sit if you want a bit of privacy.

Then again, this space has a slight problem with acoustics -- it's pretty noisy.  Not as bad as some places I've gone, but it's still a bit loud for my personal taste.

There are several different wines available by the glass, carafe (which is about half a bottle) or bottle, and the menu is quite varied -- though the food is Italian.  There are appetizers, pastas, pizzas, and entrees, all of which are varied.

For an appetizer, I ordered arancini -- fried rice balls.  Creamy risotto rice was wrapped around aged provolone cheese and prosciutto, breaded, formed into balls, and fried.  This was quite heavenly, with the interior's creaminess being a great contrast to the hard, crispy shell.  The aged provolone gave a nice bite, and the prosciutto was not so salty that it overpowered anything.   The flavors matched quite well.

My companion had "egg and sausage," which is a deceptively simple name for the dish.  One egg, cooked perfectly over-easy, was on top of a few slices of sausage -- which is made at the Corner Room -- and all this was served over a bowl of creamy warm polenta.  This is the kind of dish you could have for breakfast, lunch, and/or dinner, and it would be appropriate -- and tasty.

We both ordered an entree and decided to split a pasta dish.  We ordered a rigatoni and lamb sugo.  The pasta was brought out as its own course, which is traditional in Italy.  The pasta was wonderfully chewy, and a good complement to the robust lamb sauce.  The sauce was not very "lamby," for lack of a better word.  It could have been made with any other ground meat.  It was also a little thin, with a pool of the tomato base of the sauce in the bottom of the bowl.

My entree was the chicken marsala, served with asparagus spears and polenta.  The polenta (as in the "eggs and sausage") was fantastic, and the asparagus was cooked just right.  There were no mushrooms in the dish (though mushrooms are traditional in this recipe), but the server advised me of this when we were ordering.  The chicken itself was tasty, but not outstanding.  I kept going back to the polenta.

My companion had a fish special, served over quinoa -- a "pseudoscereal"which had a texture similar to kasha or buckwheat.  The dish was quite nice, and the quinoa was a wonderful surprise.

In all, our two entrees, large pasta, two appetizers, and carafe of wine was $81.  It's a little pricy, no doubt, meaning The Corner Room will likely be relegated to "special occasion" type of meals for me, but the quality of the food is worth it.

OVERALL RATING:  7.5 out of 10.

Saturday, June 12, 2010

Recipe: Mint Chocolate Chip Cookies

MINT CHOCOLATE CHIP COOKIES:

1 cup + 2 Tbsp flour
1/2 tsp baking soda
1/4 tsp salt
1 stick of butter (8 oz a.k.a. 1/4 lb), softened
6 Tbsp brown sugar
6 Tbsp granualted sugar OR Stevia sugar substitute
1 egg
1 tsp mint extract
1 cup good chocolate chips (the better the chips, the better the cookies)

Combine the flour, baking soda, and salt in a small bowl and set aside.

In a mixing bowl, add the butter and sugars.  Using a hand mixer, cream the butter and sugar together on high.  The end result will be light and fluffy and only slightly tan.  If the butter is at room temperature, it shouldn't take more than 3-5 minutes.  If you beat them together longer, you will end up with flatter, more spread out cookies.  For a more cakey cookie, beat until everything is just creamed together and fluffy.  Add the egg and the extract, and beat on medium until everything just comes together.

Add 1/2 of the flour mixture to the butter mixture and mix together.  Add the rest of the flour mixture and stir together until the dough forms.  I wouldn't recommend using the electric hand-mixer for this bit, because if you over-mix the dough, gluten will form and you will get tougher cookies.  Add the chocolate chips and stir to combine.

Take a cookie-sheet or half sheet-pan and line it with either a silicone baking mat or parchment paper.  Portion 1 Tbsp of the dough per cookie and and put it on the lined pan about 2-3 inches apart from each other.  You'll likely get 12 or 15 per pan.  I have a small disher ("ice cream scoop') that holds about 1/2 Tbsp, so I just put two blobs out of that on top of each other on the pan.

At this point, turn the oven on to 375.  This will give the flour in the dough a little more chance to soak up moisture from the egg.  If you wanted, you could refrigerate the dough for up to 2 days if you covered it in plastic wrap.  But let's face it -- who wants to wait 2 days to eat cookies that you're making the dough for today?

When the oven has heated, put the pan(s) in and cook for 9-11 minutes, or until the edges are nicely browned.  Remove from the oven, and let them sit on the pan for 2 minutes.  This will let the insides finish cooking and keep them from falling apart when you take them off the pan.  Remove the cookies to a cooking rack and allow to cool completely (about 10 minutes).  If you try to eat one now, you'll end up with a mouthful of molten chocolate chips.

Recipe: Gnocchi Carbonara

GNOCCHI CARBONARA

1 package gnocchi
1 egg
1/3 cup Parmesano Reggiano or similar cheese (pecorino, asagio, etc.)
3 slices of thick-cut bacon or pancetta
pepper to taste

You can use fresh gnocchi that you make yourself, of course, but that's a different recipe.  The packaged or frozen stuff will work just fine for this.

First, put a pot of water on to boil.

In a large bowl, mix the egg and the cheese together, and then add the pepper.  Set aside.

Chop the bacon into small pieces (about 1/4 inch square).  Put them in a frying pan over medium to medium-low heat and cook to render out some of the fat.  When it is about halfway cooked through, turn the burner down to low.  You don't want to burn your bacon.

When the water comes to a boil, drop in the gnocchi.  It should only take a couple of minutes to cook.  when it floats, it's done.  Strain the hot gnocchi.

Add a few of the still-hot gnocchi to the egg and cheese mixture, stirring it quickly.  Add a few more gnocchi, continuing to stir, and then do it a third time.  You want to raise the temperature of the egg slowly so that you don't scramble it -- and scrambled eggs is what you'd get if you dumped all the hot pasta into the eggs at once.  After three small additions, it should be fine to add the rest of the gnocchi, stirring.

If the bacon is not cooked through, turn up the heat and cook until crisp.  Drain off most of the fat that rendered out, and then add the bacon to the gnocchi and give it a toss to combine.  Serve hot.

Wednesday, June 9, 2010

Restaurant Review: David's 388, South Portland, ME

Oh, dear.  How the mighty have fallen.  I have eaten at this restaurant twice before -- including a birthday dinner -- and the food was exquisite.  That was NOT the case last night.

David's 388 (388 Cottage Rd., South Portland, Maine) is a surprisingly up-scale restaurant in the space formerly occupied by a breakfast/lunch joint.  It has just finished its expansion into the space that was occupied for decades by a barbershop.

The decor is modern, and the open kitchen lets you watch the staff as they prepare food.   There is also a bar stocked with the usual liquors and a fairly extensive wine list for the size of the space.  There are around 8-10 choices for wine by the glass, ranging from $6.50 - $11.00 each, with many more full bottles available for purchase.  There are also some oddly-shaped trapezoidal booths near the front doors so narrow that one wonders how people can sit and eat comfortably.

However, the first thing that you notice is most likely to be the noise.  It is LOUD in this place.  My companion and I sat at the bar (which had no one sitting within 8-10 feet) and I still could not hear the specials as they were recited to me.  The music was of the Billie Holiday/classic jazz variety, and the volume was turned up so it could be heard over the cacophony of voices.  The sound bounced off of the tin ceilings and walls, with nothing dampening it at all.  I had to speak at an uncomfortably loud volume to carry on what I hoped was a private conversation with my companion.

I ordered the duck pot-stickers as an appetizer, but that's not what arrived a short while later.  Pot-stickers are Chinese dumplings that are steamed and then lightly fried/seared in the pan after the water has evaporated -- they are called pot-stickers because they literally stick to the pot they're cooked in.  These were dumplings, but they were deep-fried and crispy.  There was also no duck in my duck dumplings, though there was a little crispy duck skin in the small wilted-greens salad served with them.  The dressing was slightly tangy and spicy.  It was a tasty dish, but it was not what was on the menu.

My entree order was a ginger and scallion crusted salmon with sesame snow peas and wasabi mashed potatoes.  The presentation was attractive.  However, there was no noticeable ginger in the ginger crusted salmon (which seemed to be just coated in bread crumbs), though there were a few slices of scallion on the top.  The vegetables on the plate consisted of two asparagus spears and two snow peas.  There was a very faint taste of wasabi in the potatoes, which were not really mashed.  They had been boiled, but someone forgot to mash them very well, as there were spoon-sized pieces of unmashed root in them.  What tasted like pure hoisin sauce was drizzled over the plate, but the sweet taste of it overpowered the taste of the other items on the plate, so I avoided it as much as I could after a couple of bites.  Again, the food tasted good -- though not exceptional -- but it was not as described on the menu.

David's 388 serves smaller portions for their "main" dishes on their menu, which is something I applaud. Too often I've gone to a restaurant and ended up with a truly unholy amount of food on the plate that I then feel obligated to eat due to the fact that I'm paying for it, and some things don't "doggie bag" very well.  Oddly, though, the entree was about the same amount of food as the appetizer, though.  The major difference was the fact that the main dish was served on a plate that was much too large for the amount of food.

I was sorely disappointed.  I have had some fantastic food at David's 388 before, but this was not the case last night.  The food was acceptable, but not exceptional.  The server commented that the kitchen staff was fairly new, so perhaps some of the issues can be chalked up to them not being familiar with the items on the menu or how to steam a freaking pot-sticker.  (Not knowing the basic cooking technique kind of sticks in my craw on this one.)  The volume of the ambient noise and the music are a little overpowering.

The cost was not unreasonable.  Two appetizers, two entrees, and a beer cost $57, but this does come across as a bit pricy when you take into account the amount of food you actually get.  I mean, $14 is a lot of money for a 2-oz portion of salmon, 2 asparagus spears, 2 snow peas, and a fist-sized portion of boiled potatoes.

Based SOLELY on last night's experience, I could give David's 388 a rating no higher than 6 out of 10. Prior dinners would rank significantly higher, and I sincerely hope that last night was just an "off" night instead of an indication of how things will now be.

Monday, June 7, 2010

Recipe: Chicken Cordon Bleu Roll-ups

4 Chicken Breasts
4 slices ham or proscuitto
4-6 slices of swiss, gruyere, Ementaller, or similar cheese OR 1/2 cup shredded cheese
1/2 cup flour
2 eggs
1 cup bread crumbs (I prefer panko)
1/2 tsp thyme
1/4 tsp rubbed sage
1/2 tsp salt
pepper to taste
2 Tbsp butter, melted

The first step is to pound the chicken flat.  To do this, first place a chicken breast between two sheets of plastic wrap.  Then pound it to about 1/4 - 1/2 inch thick using either a meat tenderizer or a big heavy pan like a cast iron skillet.  I really like the cast iron skillet; since it has a large surface area and is heavy, it will help prevent the meat from tearing as it flattens.  4-5 good whacks (keeping the skillet as flat as possible) is all it usually takes for the average chicken breast to be about the right thickness.

Once the breast is flat, take off the top piece of plastic wrap.  Place1 slice of the ham and 1/4 of the cheese on top of the flattened chicken.  You want a little chicken to "frame" the filling.

Now for the trick.  Flip the top end of the chicken over the top.  Grabbing the plastic wrap farthest from you, pull it toward you, rolling the chicken into a tube.  Now, you want to tighten the plastic wrap on both ends so that it looks like a piece of hard candy wrapped up in cellophane.  You may need to lay the plastic wrap flat again after rolling up the chicken, then set the chicken on one end and roll it up.  Then grab the ends of the plastic wrap poking over the sides of the chicken, and twist to tighten.

Repeat all the above for each piece of chicken.  Then -- and this is actually pretty important -- put it in the fridge for at least 15 minutes.  Half an hour is better.  This will chill the meat and help keep it from falling apart as you bread it and cook it.

Now, set up a breading station.  Put the flour in one bowl.  Crack the eggs into another bowl and then scramble them with a fork.  In a third bowl, mix all the other ingredients well.  Also, spray a baking dish or a non-stick pan with non-stick spray and preheat the oven to 350F.

One at a time, carefully and gingerly unwrap the chicken roll ups.  Working VERY carefully, coat the chicken lightly with flour, tapping off any excess.  Then cover in the egg, and finally the bread crumbs.  (You want to do it this way so that there is a dry surface for the egg to stick to, which gives a wet surface for the bread crumbs to stick to.)   If you can, use one hand to move the chicken from the flour to the egg, and the other hand to coat the chicken with the bread crumbs.  Otherwise, you may need to wash you hands between each rollup.  As you coat each one, put it in the baking dish.

Once all the chicken is breaded and in the baking dish, bake it uncovered for 25-35 minutes, depending on the size of the breasts and how tightly they're wrapped.  Serve hot.

And yes, I know there's only 3 pieces in the last picture.  There was only 3 pieces of chicken in the package I took out to defrost.

Saturday, June 5, 2010

Recipe: Irish Oats & Whole Wheat Pancakes

1/2 cup Irish (aka steel-cut) oats
3/4 cup boiling water
1/3 - 1/2 cup whole wheat flour
2 tsp baking powder
1/2 tsp salt
2 Tbsp sugar (or Stevia sugar substitute)
1 egg
1 Tbsp melted butter
dried fruit or fresh berries (optional)

First, combine the oats and the boiling water in a bowl, then go have a cup of coffee.  It needs to soak for at least 10 minutes (20 wouldn't hurt anything).   As this cools, mix the dry ingredients (flour, baking powder, salt, and sugar) in another bowl.  After the oats have cooled, add the egg and butter to them, and mix well.  Add the dry ingredients to the wet, and mix by hand for about 15 seconds -- only until everything is incorporated.

Heat a griddle or heavy skillet over medium heat until a drop of water dances on the surface when put onto it.  You may need to lightly oil the cooking surface, depending on what you're using.  One the cooking surface is hot, add about 1/3 cup of the batter onto the center of the pan.  If adding dried fruit or berries, sprinkle lightly onto the top of the batter at this time.  Cook for about 2 minutes, or until the edges of the pancake start to dry and are set.  Bubbles that pop near the edges should stay "open" and not be immediately filled with batter.  Flip and cook for another 2-3 minutes on the other side.  Repeat until you run out of batter.

Serve hot, preferably with real maple syrup.

Thursday, June 3, 2010

Recipe: Simple Steak Fajitas

SIMPLE STEAK FAJITAS

1 piece skirt steak (approx 1.5 lbs)
2 limes
1/2 tsp kosher salt
2 cloves garlic or 1 clove elephant garlic
1 onion
2 bell peppers (any color)
tortillas
salsa or taco sauce
shredded cheese

Trim any excess fat off of the skirt steak.  Cut it into 2-4 pieces -- you'll be putting the meat into a zip-top bag to marinade.

To make the marinade, juice the limes.  Mince the garlic, and then, using the side of the knife, grind the salt into the minced garlic.  This will make a rough garlic paste.  Add this to the lime juice.

Put the steak and the marinade into a zip-top bag, and leave for 30 minutes-1 hour.

Heat your heaviest skillet (preferably cast iron) over high heat.  Remove the steak, and dab dry with paper towels.  Add the meat to the pan and sear the meat for 2-3 minutes per side.  You may have to work in 2 batches.  Move the cooked meat to some foil and cover tightly.

Turn the heat on the skillet down to medium to medium-low.  Cut the onion in half and slice thinly.  Similarly, remove the seeds from the bell peppers and cut into thin strips.  Add the veggies to the pan and cook, stirring constantly, until they are limp.  They may char slightly on the edges, but that's perfectly fine.  Remove the vegetables from the heat.

Take the meat and slice thinly against the grain.  Heat the tortillas to make them flexible.  Add some meat and vegetables to one side of the tortilla.  Add cheese, salsa, and/or taco sauce as you like, then roll the tortilla around the filling.  I usually fold one side of the tortilla over before rolling it so that there is a "pouch" in the bottom that will catch any juices that may come out of meat or veggies.

Tuesday, June 1, 2010

Recipe: Smoked Turkey Breast

There is only one ingredient:  turkey breast.    This is all about the cooking.

Most turkey breasts you see in the grocery stores have been brined.  This is soaking it in a salt water solution, usually with some sugar and other flavorings added.  This makes it VERY forgiving to long cooking preparations, like smoking.

Before you do anything, you need hardwood chips.  I'd recommend hickory, mesquite, or apple, but any hardwood will do.  (Never use pine, cedar, or any other softwood.  The smoke will have way too much soot in it, among other things.)  Get a big pot of water, and put several big handfuls of the wood chips in it. Let the wood soak for an hour or more to saturate it.  This is to make sure that the wood will smolder and smoke as opposed to catch fire.

And now, on to the food.  First, rinse off your turkey breast under cold water.  Lift up the flaps of skin, and -- using your fingers as much as possible and no knife if you can help it -- remove as much of the fat under the skin as you can.  Dry the turkey with paper towels.

Now it's time to set up your grill for indirect heating.  If you have a charcoal grill, you'll pile the coals as far to one side of the grill as you can.  If you use a gas grill, turn on only the burner all the way to either the left or the right.

Next, to start the smoke.  If using charcoal, you'll be able to just throw the wood chips on the coals.  However, you'll likely have to do this more often, which means opening the grill and releasing heat, which will increase the cooking time.

A fas grill is a little more complicated, but it will also give you more control and probably give you a quicker cooking time.  If you have a "smokebox," you'll use this.   A smoke box is more or less a metal box with some holes in it.  I don't have one of these, but I do have a little pan from an old (no longer functioning) toaster oven.  You can also use disposable aluminum pie pans or even just a  pouch made of heavy-duty aluminum foil -- but I would not recommend using thin aluminum foil to make a pouch.

Drain about 2 cups of the wood chips, and put them in the pan/pouch and cover it with heavy duty foil tightly.  (This will help keep the wood from catching fire, since it reduces the amount of oxygen near the wood.)  Poke 6-8 SMALL holes in the foil on the top.  Place the smokebox near the fire on the gas grill.   Within a couple of minutes, you should see some wisps of smoke coming out of the holes.  (If charcoal, put the wood directly on top of the coals).

Put the turkey breast on the grill as far away from the heat as you can.  If you have a stand roaster (it's a device that looks sort of like the middle of a Bundt cake pan or a tube pan -- you stick the vertical part into the cavity, and it stands the bird up for roasting), use it.  Put a meat or instant-read thermometer in into the center of the biggest part of the turkey breast.  Close the grill and keep an eye on the temperature.  You do not want the interior of the grill to get lower than 200 degrees F or much higher than 250 degrees F.  225F-250F is perfect.  On my grill, this is one burner at about "medium low," but your grill will likely be different.  WARNING:  Having the temperature too low can increase your risk for food poisoning.  Nobody wants that.

Check your grill every 15 minutes just to make sure that smoke is still coming out from around the edges.  When this stops, you'll replace the wood chips.  You want to open the lid of the grill as little as possible.

Generally, the breast will need to cook at least 30-45 minutes per pound, plus an additional 15-30 minutes for every time you open the grill.   Cook it until the internal temperature of the turkey is 156-160 degrees.  Remove the turkey and wrap it tightly in foil without removing the thermometer.  Let it set for 30 minutes or longer, and then carve and serve.