Thursday, July 1, 2010

Recipe: Spanish Tortilla

SPANISH TORTILLA

8 eggs
1/2 lb bulk sausage (chorizzo, garlic, Italian hot, etc.)
5-6 oz mushrooms, sliced (white button or crimini)
4-5 scallions, sliced
1/4 tsp salt
1 medium potato
4 Tbsp olive oil

This obviously is not the tortilla you'd get at a Mexican restaurant.  That is closer to an unleavened flatbread....and a different recipe.  This is what you'd get if you went to Spain and got a tortilla.

In a large bowl, scramble the eggs.

In a medium-sized non-stick pan (a 10-inch omelette is a good pan to use), add the sausage, mushrooms, and scallions and cook over medium heat.  Add the salt to help draw out the moisture from the mushrooms.

Once cooked through, add about 1/4 directly into the eggs, stirring the eggs to keep them from scrambling. Add another 1/4, still stirring, then the rest, and stir to combine.

Using a box grater (that you grate cheese with), turn it to the "slicing" side.  It's the side that you otherwise will never use, that has 1-3 wide openings on it that run the length of the side.  Use it to slice the potato thin.  If you don't have one, use a sharp chef's knife to slice the potato 1/8 - 1/4 inch thick -- no thicker.

Add 2 Tbsp of the olive oil to the pan, and heat over medium heat.  Add the potato to the oil (it WILL sizzle and make noise), and put a lid on the pan.  Give it a shake every couple of minutes until the potato slices are cooked through -- 5-10 minutes.  Add the potato slices to the eggs a little at a time, just like you did the sausage mixture.

Clean the pan of any pieces of potato, sausage, etc., that may be stuck to it.  Add the other 2 Tbsp of oil, and heat on high.  You want this oil HOT.  If you look at it, the surface will "shimmer," and it's o.k. if you're just starting to see a couple wisps of smoke.

You're going to work fast, now.

Quickly add the egg mixture to the oil.  Shake the pan constantly for 30 seconds.  Allow to cook for another 2 minutes.  Now, flip it over.  If you're not confident into your "pan flipping" abilities, take a large plate (and oven mitts) and slide the eggs onto the plate.  Now, put the pan over the plate, and (using the oven mitts), grab the plate and the pan and quickly flip it over.  Put back over the high heat, and shake for another 30 seconds.  Allow to cook for 2 more minutes, and then slide it out of the pan and onto a serving plate.
Allow to cook for 15 minutes.  This will let the eggs in the center that may not be cooked when you de-pan to cook from the residual heat in the rest of the dish.  Slice and serve warm.

Saturday, June 26, 2010

Recipe: Grilled Pizza

GRILLED PIZZA

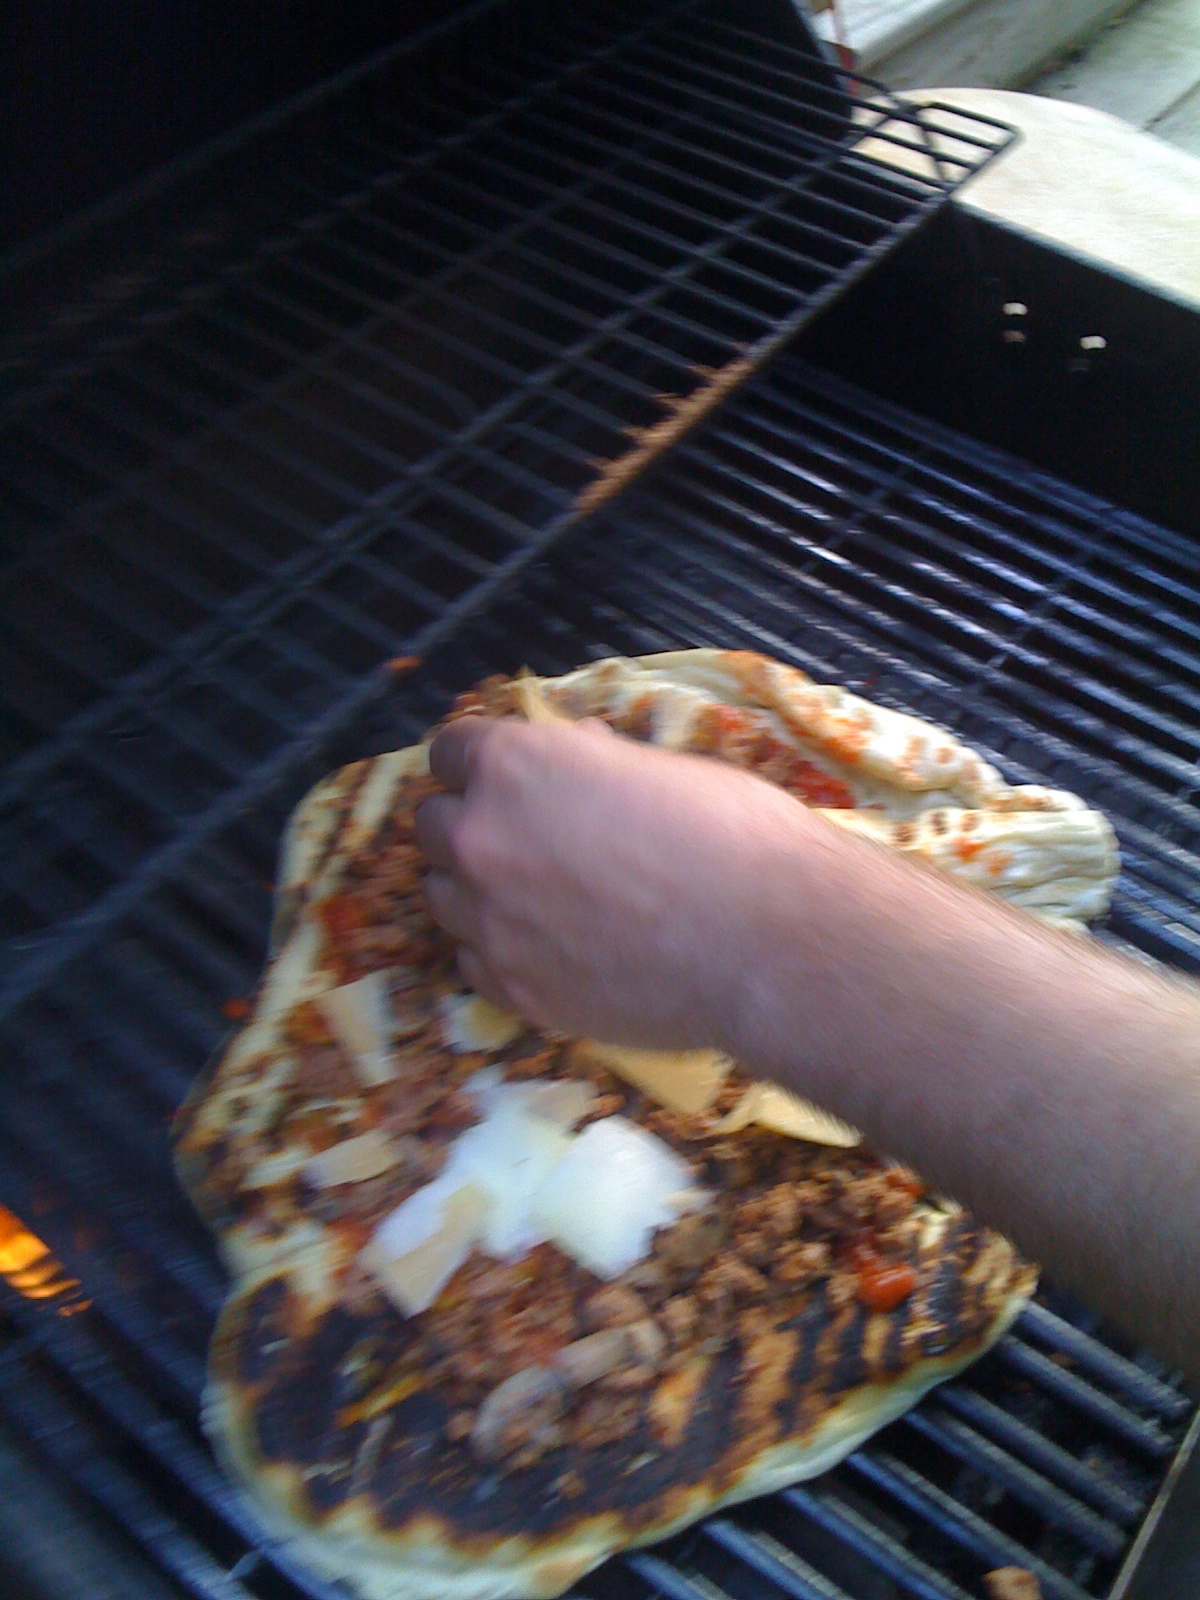
This is actually going to be less of a recipe than a technique.  What you put on your pizza is up to you, though I'm a fan of chorizo sausage, mushrooms, and olives, as well as aged gouda and asiago cheeses.

1 lb pizza dough (home made or bought)
1/2 cup cup olive oil, divided into 2 parts
1/3 c tomato sauce
1/2 cup shredded cheese
1/2 cup other toppings

Clean your grill.  Anything on the grill grates will end up on the dough.  Then brush the grates with olive oil.  Finally, turn all burners as high as they will go.  If using charcoal, light it up and let it get hot.  Close the cover.

Slice and cook your toppings, if necessary.  Any raw meats (bacon, sausage, etc.) and most mushrooms or veggies (onions, peppers, asparagus spears, etc.) should be cooked prior to putting them on the pizza, because they won't be on the heat long enough to cook through when the pizza goes on the grill.  Also, this is a thin-crust pizza, so be fairly sparing with your toppings.

In the kitchen, lightly flour a large pizza peel or flip a cookie sheet over and flour the underside.  Stretch the dough as thin as you can get it, and then roll it even thinner.  You want it as thin as you can get.  Brush it with olive oil.  


You want your grill thermometer to read at least 550 -- the higher the better.  

BE WARNED: ONCE YOU START YOU HAVE TO MOVE FAST.  YOU NEED EVERYTHING EASILY ACCESSIBLE.  IT WILL GO FROM YUMMY TO CHARCOAL QUICKLY IF YOU ARE NOT CAREFUL.

Flip the dough over directly onto the grill, so that the oil side is down.  Quickly brush the other side with oil.  Allow to cook 1-2 minutes, until "blisters" form that you can see on the dough.  Once new blisters  have stopped forming (no longer than 3 minutes), take a pair of tongs or the pizza peel, and take the dough off the grill and flip it over so that the raw side is down.  (If your grill is clean, it will not stick.)  

Work quickly, now.  Put the tomato sauce on the dough, and smear it around.  Sprinkle the toppings onto the pizza, starting with any meat/vegetables and ending with the shredded cheese.   Don't take more than 1 minute to do all of this.  Now, close the grill for another 2-3 minutes.  You want to trap as much heat as you can so that the cheese can melt.  Open the grill lid and remove the pizza.

Allow to rest for a few minutes, then slice and serve.


Monday, June 21, 2010

Recipe: Ground Turkey Stroganoff

GROUND TURKEY STROGANOFF

3 Tbsp olive oil
1/2 lb (8 oz) mushrooms (white button or crimini), sliced
1/4 tsp salt
1 onion,  sliced or roughly chopped
1 package (usually around 1 1/4 lb) ground turkey
1/4 cup flour
2 cups turkey, chicken, or vegetable stock (broth will work in a pinch)
2 Tbsp sherry (not cooking sherry; NEVER cooking sherry)
1 tsp ground dry mustard
2 Tbsp tomato paste
pinch (1/8 tsp) each oregano and dill
1 cup green (sweet) peas
1/3 cup low- or non-fat Greek yogurt or sour cream

Heat the olive oil in a saute pan over medium-low heat.  Add the mushrooms and salt, and saute.  When cooked, remove from the pan.  Add the onions and cook.  When transparent, add the ground turkey and cook until no longer pink.  Turn the heat to high and cook out most of the moisture -- but not all.

Reduce heat back to medium.  Add the flour to the pan, stirring to combine.  Cook for 2-3 minutes (this will cook out the "flour" taste.  Slowly add the stock, stirring constantly to avoid lumps.  Allow it to come to a boil, stirring occasionally, until it thickens slightly.  Add the sherry, mustard, tomato paste, and herbs, stirring.  Boil for 10-20 minutes, until the consistency of a thick gravy.  Add the yogurt and stir it in.  Remove from heat.  Serve with egg noodles or fresh french baguette.


Friday, June 18, 2010

Recipe: Your Own Microwave Popcorn

YOUR OWN MICROWAVE POPCORN

1/4 cup unpopped popcorn
1 lunch-sized brown paper bag
1 stapler
1 microwave

Put the unpopped popcorn into the bag.  Use 1 staple to close the bag.  Put the bag in the microwave.  Nuke it on high for 3-5 minutes, depending on your machine, or until the pops are 3-5 seconds apart.

Easy isn't it?  Most people will have objections to this, though, so I'll counter as many as I can think of

1)  The staple is metal, and you can't put metal in the microwave.

Both are true.  However, the staple is actually SHORTER than the wavelengths of the energy put out by the microwave.  [Techspeak:  A microwave generates radiation with a wavelength of approximately 4.10 inches (122 millimeters)].  So long as you use only 1 staple, you're not going to cause any arcing or ruin your microwave.

2)  I don't microwave popcorn because it burns easily.

True, but only if you buy microwave popcorn.  In "store-bought" popcorn, there is a good deal of solidified oil (i.e., fat) in the bag along with the popcorn.  That's why it doesn't rattle when you shake it.  Microwaves heat fat and water molecules much more efficiently than starch molecules.  [Techspeak:  The polarized molecules absorb non-ionizing microwave radiation using dielectric heating, and the molecules rotate and vibrate to align themselves.]  In a bag of "store-bought" popcorn, you are heating the oil, which in turn heats the popcorn to make it pop....but the oil stays hot.  This is what makes store-bought popcorn burn so easily.

Since there is no oil in this bag of popcorn, though, this can't happen.  Instead, the microwaves are exciting the water molecules trapped inside the popcorn kernels.  When they pop, the water immediately evaporates.  Since starch molecules do not heat as easily in a microwave, they will not burn easily.  It's possible to do so, I guess, but I've not yet done it.

3)  The popcorn isn't popping very fast compared to the bags I buy from Orville Red.....

That's because there's no oil in this bag.  Also, there's a lot less popcorn in this bag.  Look at the nutritional information on the bag of Orville's.  You'll see that there's 3 servings of popcorn in that bag.  When was the last time you ate 1/3 of a bag of microwave popcorn?

Look also at the calories.  You're getting 230-250 calories per serving.  Multiply that by 3, and you're getting around 690-750 calories in that bag of Orville's -- most from fat.  I hope you skipped a meal or two, because the average adult needs 2,000 -- 2,500 calories per day.  Congrats, you just ate about 1/3 of your daily calories.

This recipe, however, using Orville's popcorn that you'd pop on the stove or in an air-popper, is about 160 calories for the WHOLE RECIPE.  Technically, the recommended serving size is 3 Tbsp unpopped (a 1/4 = 4 Tbsp), but I like popcorn.  It's also a heck of a lot cheaper this way, costing only a few cents to make mine vs. more than dollar per bag for most microwave popcorn brands.

If you want to add a little salt, herbs, olive oil, butter, etc., to flavor your popcorn, go ahead....I like my popcorn naked, though.

Wednesday, June 16, 2010

Review: The Corner Room

The Corner Room (110 Exchange St., Portland, ME) is named such because it sits at the corner of 2 streets (Exchange and Federal Streets) at the "top" of the Old Port section of Portland.  They do not take reservations, but there were plenty of tables free when I went there on a Friday night.


There are tables lining one wall that is primarily windows, some booths in the center of the space, and the kitchen and a bar to the left as you enter the area.  There are also a few tables outside on the fairly busy sidewalk on Federal Street.  Since the sidewalk isn't very wide and the tables outside aren't very big, this would not be a good place to sit if you want a bit of privacy.

Then again, this space has a slight problem with acoustics -- it's pretty noisy.  Not as bad as some places I've gone, but it's still a bit loud for my personal taste.

There are several different wines available by the glass, carafe (which is about half a bottle) or bottle, and the menu is quite varied -- though the food is Italian.  There are appetizers, pastas, pizzas, and entrees, all of which are varied.

For an appetizer, I ordered arancini -- fried rice balls.  Creamy risotto rice was wrapped around aged provolone cheese and prosciutto, breaded, formed into balls, and fried.  This was quite heavenly, with the interior's creaminess being a great contrast to the hard, crispy shell.  The aged provolone gave a nice bite, and the prosciutto was not so salty that it overpowered anything.   The flavors matched quite well.

My companion had "egg and sausage," which is a deceptively simple name for the dish.  One egg, cooked perfectly over-easy, was on top of a few slices of sausage -- which is made at the Corner Room -- and all this was served over a bowl of creamy warm polenta.  This is the kind of dish you could have for breakfast, lunch, and/or dinner, and it would be appropriate -- and tasty.

We both ordered an entree and decided to split a pasta dish.  We ordered a rigatoni and lamb sugo.  The pasta was brought out as its own course, which is traditional in Italy.  The pasta was wonderfully chewy, and a good complement to the robust lamb sauce.  The sauce was not very "lamby," for lack of a better word.  It could have been made with any other ground meat.  It was also a little thin, with a pool of the tomato base of the sauce in the bottom of the bowl.

My entree was the chicken marsala, served with asparagus spears and polenta.  The polenta (as in the "eggs and sausage") was fantastic, and the asparagus was cooked just right.  There were no mushrooms in the dish (though mushrooms are traditional in this recipe), but the server advised me of this when we were ordering.  The chicken itself was tasty, but not outstanding.  I kept going back to the polenta.

My companion had a fish special, served over quinoa -- a "pseudoscereal"which had a texture similar to kasha or buckwheat.  The dish was quite nice, and the quinoa was a wonderful surprise.

In all, our two entrees, large pasta, two appetizers, and carafe of wine was $81.  It's a little pricy, no doubt, meaning The Corner Room will likely be relegated to "special occasion" type of meals for me, but the quality of the food is worth it.

OVERALL RATING:  7.5 out of 10.

Saturday, June 12, 2010

Recipe: Mint Chocolate Chip Cookies

MINT CHOCOLATE CHIP COOKIES:

1 cup + 2 Tbsp flour
1/2 tsp baking soda
1/4 tsp salt
1 stick of butter (8 oz a.k.a. 1/4 lb), softened
6 Tbsp brown sugar
6 Tbsp granualted sugar OR Stevia sugar substitute
1 egg
1 tsp mint extract
1 cup good chocolate chips (the better the chips, the better the cookies)

Combine the flour, baking soda, and salt in a small bowl and set aside.

In a mixing bowl, add the butter and sugars.  Using a hand mixer, cream the butter and sugar together on high.  The end result will be light and fluffy and only slightly tan.  If the butter is at room temperature, it shouldn't take more than 3-5 minutes.  If you beat them together longer, you will end up with flatter, more spread out cookies.  For a more cakey cookie, beat until everything is just creamed together and fluffy.  Add the egg and the extract, and beat on medium until everything just comes together.

Add 1/2 of the flour mixture to the butter mixture and mix together.  Add the rest of the flour mixture and stir together until the dough forms.  I wouldn't recommend using the electric hand-mixer for this bit, because if you over-mix the dough, gluten will form and you will get tougher cookies.  Add the chocolate chips and stir to combine.

Take a cookie-sheet or half sheet-pan and line it with either a silicone baking mat or parchment paper.  Portion 1 Tbsp of the dough per cookie and and put it on the lined pan about 2-3 inches apart from each other.  You'll likely get 12 or 15 per pan.  I have a small disher ("ice cream scoop') that holds about 1/2 Tbsp, so I just put two blobs out of that on top of each other on the pan.

At this point, turn the oven on to 375.  This will give the flour in the dough a little more chance to soak up moisture from the egg.  If you wanted, you could refrigerate the dough for up to 2 days if you covered it in plastic wrap.  But let's face it -- who wants to wait 2 days to eat cookies that you're making the dough for today?

When the oven has heated, put the pan(s) in and cook for 9-11 minutes, or until the edges are nicely browned.  Remove from the oven, and let them sit on the pan for 2 minutes.  This will let the insides finish cooking and keep them from falling apart when you take them off the pan.  Remove the cookies to a cooking rack and allow to cool completely (about 10 minutes).  If you try to eat one now, you'll end up with a mouthful of molten chocolate chips.

Recipe: Gnocchi Carbonara

GNOCCHI CARBONARA

1 package gnocchi
1 egg
1/3 cup Parmesano Reggiano or similar cheese (pecorino, asagio, etc.)
3 slices of thick-cut bacon or pancetta
pepper to taste

You can use fresh gnocchi that you make yourself, of course, but that's a different recipe.  The packaged or frozen stuff will work just fine for this.

First, put a pot of water on to boil.

In a large bowl, mix the egg and the cheese together, and then add the pepper.  Set aside.

Chop the bacon into small pieces (about 1/4 inch square).  Put them in a frying pan over medium to medium-low heat and cook to render out some of the fat.  When it is about halfway cooked through, turn the burner down to low.  You don't want to burn your bacon.

When the water comes to a boil, drop in the gnocchi.  It should only take a couple of minutes to cook.  when it floats, it's done.  Strain the hot gnocchi.

Add a few of the still-hot gnocchi to the egg and cheese mixture, stirring it quickly.  Add a few more gnocchi, continuing to stir, and then do it a third time.  You want to raise the temperature of the egg slowly so that you don't scramble it -- and scrambled eggs is what you'd get if you dumped all the hot pasta into the eggs at once.  After three small additions, it should be fine to add the rest of the gnocchi, stirring.

If the bacon is not cooked through, turn up the heat and cook until crisp.  Drain off most of the fat that rendered out, and then add the bacon to the gnocchi and give it a toss to combine.  Serve hot.