Saturday, July 3, 2010

Recipe: Egplant Fries

EGGPLANT FRIES

2 small eggplants
2 cups all-purpose flour
1 Tbsp garlic powder
1 Tbsp onion powder
1 1/2 tsp oregano
2 eggs
2 Tbsp water
salt to taste (preferably kosher)
oil for frying

This may sound a bit odd, but this will be some of the tastiest eggplant you've ever had.  Eggplant isn't really one of my favorite vegetables, but this works.

First off, if possible, use 2 small eggplants instead of 1 large one.  Smaller eggplants tend to be a little sweeter than larger ones.  Cut off the two ends of the eggplant, and then peel it, taking off as little flesh as you can.  A sharp vegetable peeler will work well.

Cut the eggplants into 4-5 "planks" lengthwise, and then cut these plants into strips no less than 1/2 inch wide.

NOTE:  Most recipes that I've ever read for eggplants say to cut them into planks or rounds, and then to salt and squeeze as much of the moisture out as you can.  I have NEVER done this when making eggplant in any way.  The only way they'll be bitter is if you start with big, old eggplants.  If you're using smaller, younger ones, you don't generally need to worry about it.  Also, in this case, we want plenty of moisture in the eggplant.

Heat the oil to 350-375 in a dutch oven or other large, heavy pot.

Next, mix the flour, garlic and onion powders, and oregano together.  I use a brown paper "lunch bag," but a large bowl or large zip-top bag will work just fine.

Crack the eggs into a shallow, wide bowl and add the water.  Mix well.

Take 8-12 of the eggplant strips and dredge them in the flour mixture.  Shake off the excess, and then coat in the egg.  Now, put the strips back into the flour and toss to coat.

Take the floured eggplant strips and immerse them in the hot oil.  The temperature will go down, but so long as it stays about 325 or so, you're in good shape.  If your oil is too cool, the eggplant will get VERY oily.  Fry them until golden brown and crispy.  Remove them from the oil, and evacuate them to a draining rig of some sort (I use a cooke sheet lined with a kitchen hand towel).  Sprinkle lightly with salt while they're still hot, so that the salt will stick.

Repeat with the rest of the eggplant.  Serve immediately.

Restaurant review: Bintliff's American Cafe, Portland, ME

Bintliff's American Cafe (98 Portland, St., Portland, ME) is a bit of an institution in Portland.  It's been around for decades, in a city where literally dozens of restaurants open and close during the course of any given year.  

Around the walls of Bintliff's are autographed pictures of celebrities that have visited and old (as in 100 years +) invoices and other paperwork of grocers and such.  There are two floors of tables, most on the second floor, as well as outdoor seating that is open, weather permitting.

Saturday and Sunday breakfast can be busy, often with a significant wait, but the weather today was beautiful, which opened the outside tables and allowed for fast seating.  My companion and I were given a booth indoors, and our friendly waiter was quick to our table to offer coffee.  He asked if we wanted cream for our coffee -- which I greatly appreciated, since both me and my companion take our coffee black.

We both ordered pancakes for our late breakfast.  I had  two ginger bread pancakes, which is served with a warm lemon syrup, and my companion had one of the morning specials --  two pancakes with white peaches and walnuts.  We also shared a side of corned beef hash, and my companion added an egg over easy to his order.

Pancakes here are not for the faint of heart.  As our water remarked after we were finished, it is rare for anyone to finish a stack of 3.  They are dense and big (usually more than 8 inches across).  Mine were slightly smaller than my companions, but that was perfectly fine due to the additional side of hash.

My pancakes were very tasty, only subtly of gingerbread.  It was not, as I feared it would be, big and soft gingerbread cookies.  The lemon syrup was very tart, and is best used sparingly.  Luckily, the portion of the syrup that comes with the order is small and was just the right side for the two pancakes.

My companion's peach pancakes were not, he reported, overly sweet, which was a concern.  (Since I do not care much for peaches, I did not sample his breakfast.)  White peaches were used, and they were not so juicy that they created dimples or pockets in the pancakes.  Whole walnut halves were also used.

His egg over-easy was perfectly cooked, with a very runny yolk, which he promptly broke over his pancakes and ate.

The corned beef hash is made in-house and bears no resemblance to the pasty stuff you find in cans.  Large chunks (cubes about 2 inches per side) of corned beef, potato, and sweet potato, as well as sliced and sauteed red onion.  It tasted faintly of rosemary, and the beef was only slightly fatty.

Our server was highly efficient and pleasantly chatty, though not overly so.  He kept our coffee filled and was able to answer our questions about items on the menu and ingredients in what we had ordered.

Other items on the menu include several types of Belgian waffles, huevos rancheros, as well as some breakfast frittatas and vegetarian and vegan items.  Sandwiches and salads are also served on a lunch menu.

The cost for our meal (2 orders of 2 pancakes, a side of corned beef hash, 1 egg over-easy, and 2 cups of coffee) was $26.86 -- slightly pricy for a breakfast, but the quality of the food is reflected in the slightly higher prices.  It would be nice if the pancake portions were slightly more reasonable, but luckily there is the option to order them 1 or 2 at a time instead of a full stack of 3.

OVERALL RATING:  8 out of 10.

Friday, July 2, 2010

Recipe: Fruity Bread Pudding

FRUITY BREAD PUDDING

1 stale baguette (or 5-7 slices stale sliced bread -- NEVER "Wonderbread")
3 eggs
3 cups milk
1/2 cup sugar (or Stevia or Splenda sugar substitute)
1 tsp cinnamon
1/2 tsp nutmeg (freshly grated is MUCH better than stuff in a tin)
1/2 tsp salt
1/2 cup dried (or fresh) cranberries
1 apple, peeled and diced
1/2 cup dried apricots, diced

First, toast the stale bread.  For a baguette, it's easiest to cut it in half, then slice it lengthways and pop it in a toaster oven or under a broiler for a couple of minutes.  Once it's toasted, pull it out, allow to cool, then cut into medium-siced chunks.  You should have somewhere around 5 cups of bread, but a little more or less is o.k.  Put these into a large bowl.

Mix the eggs and milk together, along with the sugar, spices and salt.  Pour these over the bread cubes, adding the fruits.  Allow these to sit for 15 minutes, or until most of the liquid is absorbed.  Turn on the oven to 375 F.

Grease a medium baking or casserole dish with butter or no-stick spray, and add the bread mixture to the dish.  If you wish, add a little ground cinnamon to the top.  Put into the oven, and allow to bake for about 1 hour, or until a knife inserted into the middle comes out clean.  Allow to cool for 30 minutes or to room temperature.  Serve warm, with or without ice cream or whipped cream, or chilled, also with or without ice cream or whipped cream.

Thursday, July 1, 2010

Recipe: Spanish Tortilla

SPANISH TORTILLA

8 eggs
1/2 lb bulk sausage (chorizzo, garlic, Italian hot, etc.)
5-6 oz mushrooms, sliced (white button or crimini)
4-5 scallions, sliced
1/4 tsp salt
1 medium potato
4 Tbsp olive oil

This obviously is not the tortilla you'd get at a Mexican restaurant.  That is closer to an unleavened flatbread....and a different recipe.  This is what you'd get if you went to Spain and got a tortilla.

In a large bowl, scramble the eggs.

In a medium-sized non-stick pan (a 10-inch omelette is a good pan to use), add the sausage, mushrooms, and scallions and cook over medium heat.  Add the salt to help draw out the moisture from the mushrooms.

Once cooked through, add about 1/4 directly into the eggs, stirring the eggs to keep them from scrambling. Add another 1/4, still stirring, then the rest, and stir to combine.

Using a box grater (that you grate cheese with), turn it to the "slicing" side.  It's the side that you otherwise will never use, that has 1-3 wide openings on it that run the length of the side.  Use it to slice the potato thin.  If you don't have one, use a sharp chef's knife to slice the potato 1/8 - 1/4 inch thick -- no thicker.

Add 2 Tbsp of the olive oil to the pan, and heat over medium heat.  Add the potato to the oil (it WILL sizzle and make noise), and put a lid on the pan.  Give it a shake every couple of minutes until the potato slices are cooked through -- 5-10 minutes.  Add the potato slices to the eggs a little at a time, just like you did the sausage mixture.

Clean the pan of any pieces of potato, sausage, etc., that may be stuck to it.  Add the other 2 Tbsp of oil, and heat on high.  You want this oil HOT.  If you look at it, the surface will "shimmer," and it's o.k. if you're just starting to see a couple wisps of smoke.

You're going to work fast, now.

Quickly add the egg mixture to the oil.  Shake the pan constantly for 30 seconds.  Allow to cook for another 2 minutes.  Now, flip it over.  If you're not confident into your "pan flipping" abilities, take a large plate (and oven mitts) and slide the eggs onto the plate.  Now, put the pan over the plate, and (using the oven mitts), grab the plate and the pan and quickly flip it over.  Put back over the high heat, and shake for another 30 seconds.  Allow to cook for 2 more minutes, and then slide it out of the pan and onto a serving plate.

Allow to cook for 15 minutes.  This will let the eggs in the center that may not be cooked when you de-pan to cook from the residual heat in the rest of the dish.  Slice and serve warm.

Saturday, June 26, 2010

Recipe: Grilled Pizza

GRILLED PIZZA

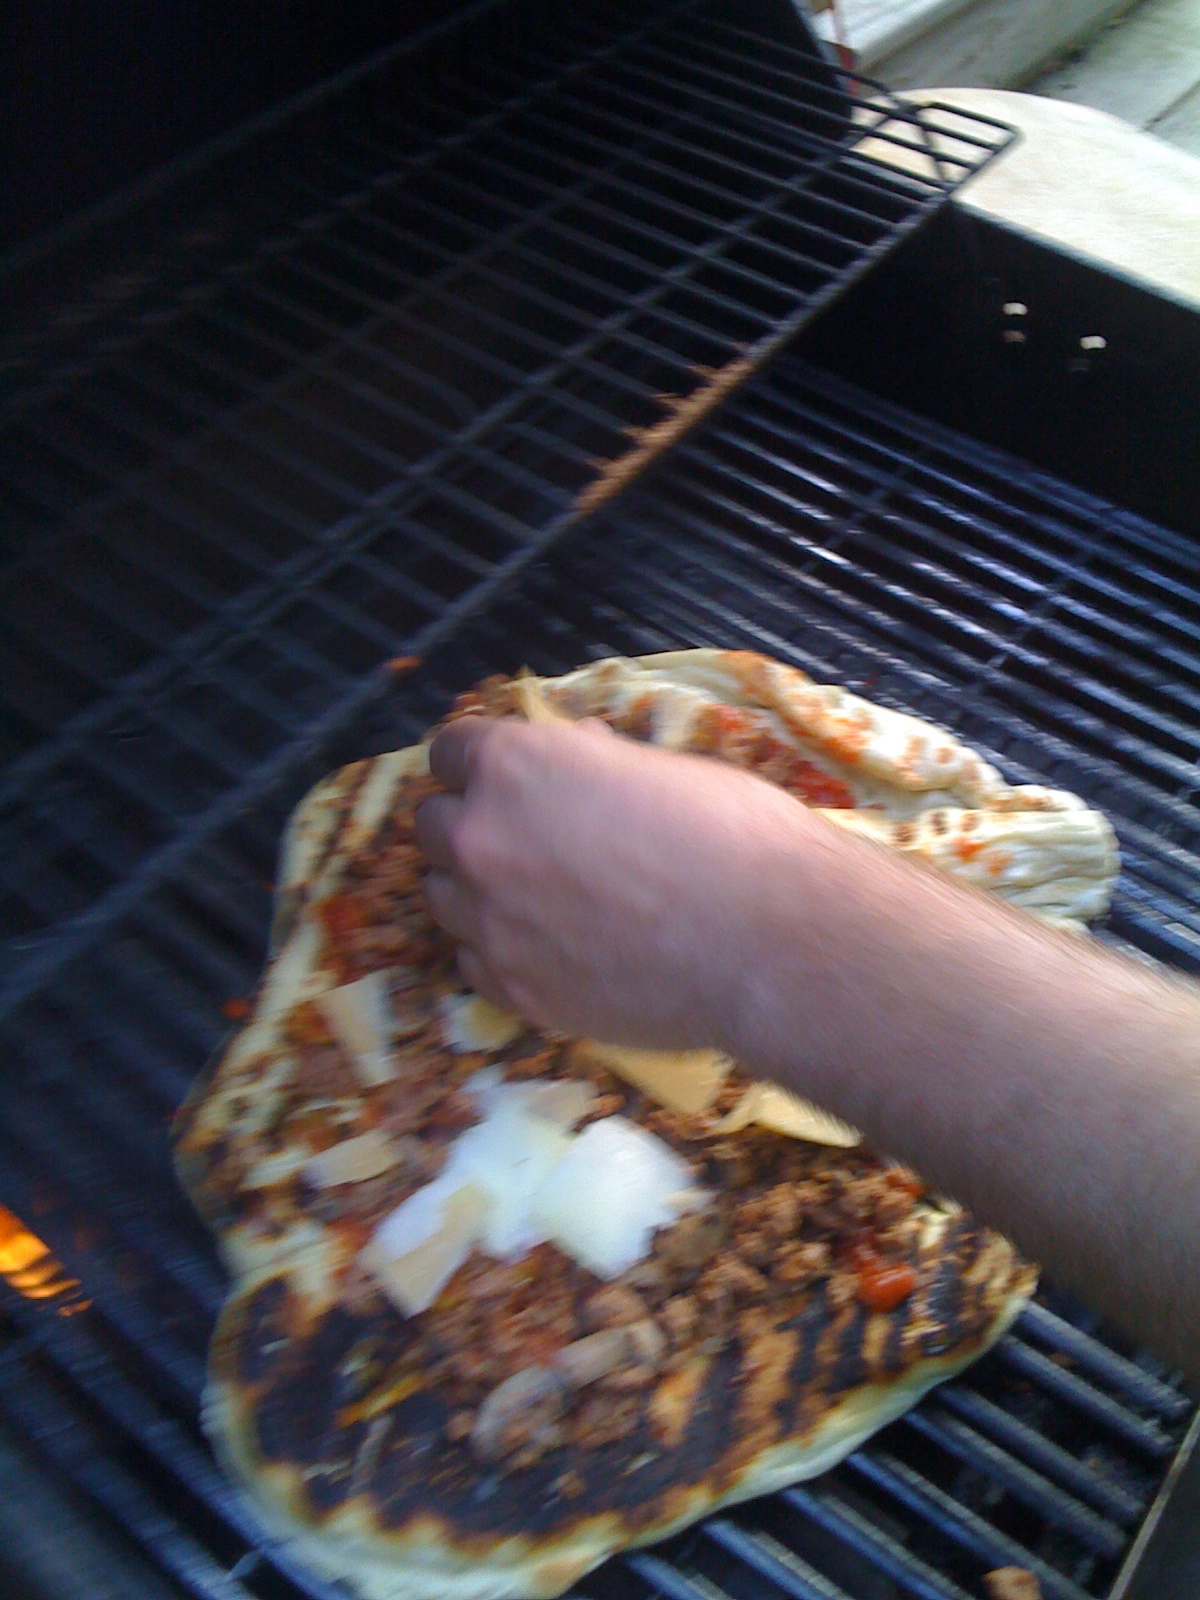
This is actually going to be less of a recipe than a technique.  What you put on your pizza is up to you, though I'm a fan of chorizo sausage, mushrooms, and olives, as well as aged gouda and asiago cheeses.

1 lb pizza dough (home made or bought)
1/2 cup cup olive oil, divided into 2 parts
1/3 c tomato sauce
1/2 cup shredded cheese
1/2 cup other toppings

Clean your grill.  Anything on the grill grates will end up on the dough.  Then brush the grates with olive oil.  Finally, turn all burners as high as they will go.  If using charcoal, light it up and let it get hot.  Close the cover.

Slice and cook your toppings, if necessary.  Any raw meats (bacon, sausage, etc.) and most mushrooms or veggies (onions, peppers, asparagus spears, etc.) should be cooked prior to putting them on the pizza, because they won't be on the heat long enough to cook through when the pizza goes on the grill.  Also, this is a thin-crust pizza, so be fairly sparing with your toppings.

In the kitchen, lightly flour a large pizza peel or flip a cookie sheet over and flour the underside.  Stretch the dough as thin as you can get it, and then roll it even thinner.  You want it as thin as you can get.  Brush it with olive oil.  


You want your grill thermometer to read at least 550 -- the higher the better.  

BE WARNED: ONCE YOU START YOU HAVE TO MOVE FAST.  YOU NEED EVERYTHING EASILY ACCESSIBLE.  IT WILL GO FROM YUMMY TO CHARCOAL QUICKLY IF YOU ARE NOT CAREFUL.

Flip the dough over directly onto the grill, so that the oil side is down.  Quickly brush the other side with oil.  Allow to cook 1-2 minutes, until "blisters" form that you can see on the dough.  Once new blisters  have stopped forming (no longer than 3 minutes), take a pair of tongs or the pizza peel, and take the dough off the grill and flip it over so that the raw side is down.  (If your grill is clean, it will not stick.)  

Work quickly, now.  Put the tomato sauce on the dough, and smear it around.  Sprinkle the toppings onto the pizza, starting with any meat/vegetables and ending with the shredded cheese.   Don't take more than 1 minute to do all of this.  Now, close the grill for another 2-3 minutes.  You want to trap as much heat as you can so that the cheese can melt.  Open the grill lid and remove the pizza.

Allow to rest for a few minutes, then slice and serve.


Monday, June 21, 2010

Recipe: Ground Turkey Stroganoff

GROUND TURKEY STROGANOFF

3 Tbsp olive oil
1/2 lb (8 oz) mushrooms (white button or crimini), sliced
1/4 tsp salt
1 onion,  sliced or roughly chopped
1 package (usually around 1 1/4 lb) ground turkey
1/4 cup flour
2 cups turkey, chicken, or vegetable stock (broth will work in a pinch)
2 Tbsp sherry (not cooking sherry; NEVER cooking sherry)
1 tsp ground dry mustard
2 Tbsp tomato paste
pinch (1/8 tsp) each oregano and dill
1 cup green (sweet) peas
1/3 cup low- or non-fat Greek yogurt or sour cream

Heat the olive oil in a saute pan over medium-low heat.  Add the mushrooms and salt, and saute.  When cooked, remove from the pan.  Add the onions and cook.  When transparent, add the ground turkey and cook until no longer pink.  Turn the heat to high and cook out most of the moisture -- but not all.

Reduce heat back to medium.  Add the flour to the pan, stirring to combine.  Cook for 2-3 minutes (this will cook out the "flour" taste.  Slowly add the stock, stirring constantly to avoid lumps.  Allow it to come to a boil, stirring occasionally, until it thickens slightly.  Add the sherry, mustard, tomato paste, and herbs, stirring.  Boil for 10-20 minutes, until the consistency of a thick gravy.  Add the yogurt and stir it in.  Remove from heat.  Serve with egg noodles or fresh french baguette.


Friday, June 18, 2010

Recipe: Your Own Microwave Popcorn

YOUR OWN MICROWAVE POPCORN

1/4 cup unpopped popcorn
1 lunch-sized brown paper bag
1 stapler
1 microwave

Put the unpopped popcorn into the bag.  Use 1 staple to close the bag.  Put the bag in the microwave.  Nuke it on high for 3-5 minutes, depending on your machine, or until the pops are 3-5 seconds apart.

Easy isn't it?  Most people will have objections to this, though, so I'll counter as many as I can think of

1)  The staple is metal, and you can't put metal in the microwave.

Both are true.  However, the staple is actually SHORTER than the wavelengths of the energy put out by the microwave.  [Techspeak:  A microwave generates radiation with a wavelength of approximately 4.10 inches (122 millimeters)].  So long as you use only 1 staple, you're not going to cause any arcing or ruin your microwave.

2)  I don't microwave popcorn because it burns easily.

True, but only if you buy microwave popcorn.  In "store-bought" popcorn, there is a good deal of solidified oil (i.e., fat) in the bag along with the popcorn.  That's why it doesn't rattle when you shake it.  Microwaves heat fat and water molecules much more efficiently than starch molecules.  [Techspeak:  The polarized molecules absorb non-ionizing microwave radiation using dielectric heating, and the molecules rotate and vibrate to align themselves.]  In a bag of "store-bought" popcorn, you are heating the oil, which in turn heats the popcorn to make it pop....but the oil stays hot.  This is what makes store-bought popcorn burn so easily.

Since there is no oil in this bag of popcorn, though, this can't happen.  Instead, the microwaves are exciting the water molecules trapped inside the popcorn kernels.  When they pop, the water immediately evaporates.  Since starch molecules do not heat as easily in a microwave, they will not burn easily.  It's possible to do so, I guess, but I've not yet done it.

3)  The popcorn isn't popping very fast compared to the bags I buy from Orville Red.....

That's because there's no oil in this bag.  Also, there's a lot less popcorn in this bag.  Look at the nutritional information on the bag of Orville's.  You'll see that there's 3 servings of popcorn in that bag.  When was the last time you ate 1/3 of a bag of microwave popcorn?

Look also at the calories.  You're getting 230-250 calories per serving.  Multiply that by 3, and you're getting around 690-750 calories in that bag of Orville's -- most from fat.  I hope you skipped a meal or two, because the average adult needs 2,000 -- 2,500 calories per day.  Congrats, you just ate about 1/3 of your daily calories.

This recipe, however, using Orville's popcorn that you'd pop on the stove or in an air-popper, is about 160 calories for the WHOLE RECIPE.  Technically, the recommended serving size is 3 Tbsp unpopped (a 1/4 = 4 Tbsp), but I like popcorn.  It's also a heck of a lot cheaper this way, costing only a few cents to make mine vs. more than dollar per bag for most microwave popcorn brands.

If you want to add a little salt, herbs, olive oil, butter, etc., to flavor your popcorn, go ahead....I like my popcorn naked, though.